Getting Started with Serviceaide Automation Orchestrator
Setting Up Connections
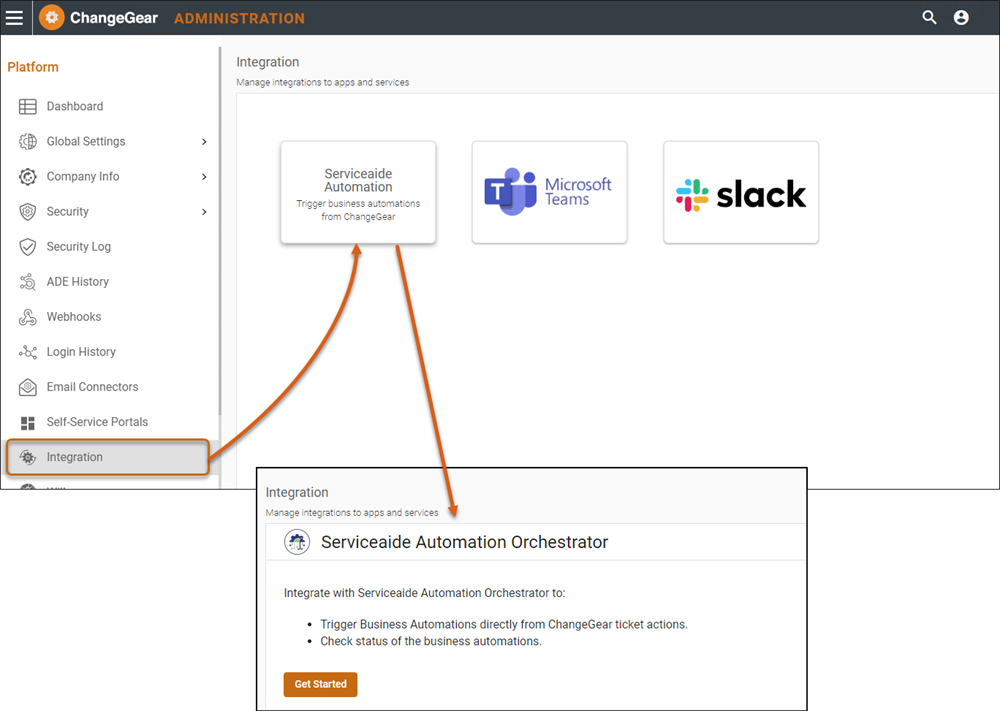
To set up an integration with Serviceaide Automation Orchestrator:
-
Navigate to ChangeGear Web Administration by clicking the hamburger menu (
 ) > Administration. Select the Integration node, then choose theServiceaide Automation card as shown below.
Note: ”Get Started” only appears when setting up your first connection. A grid with connections is displayed if at least one connection exists.
-
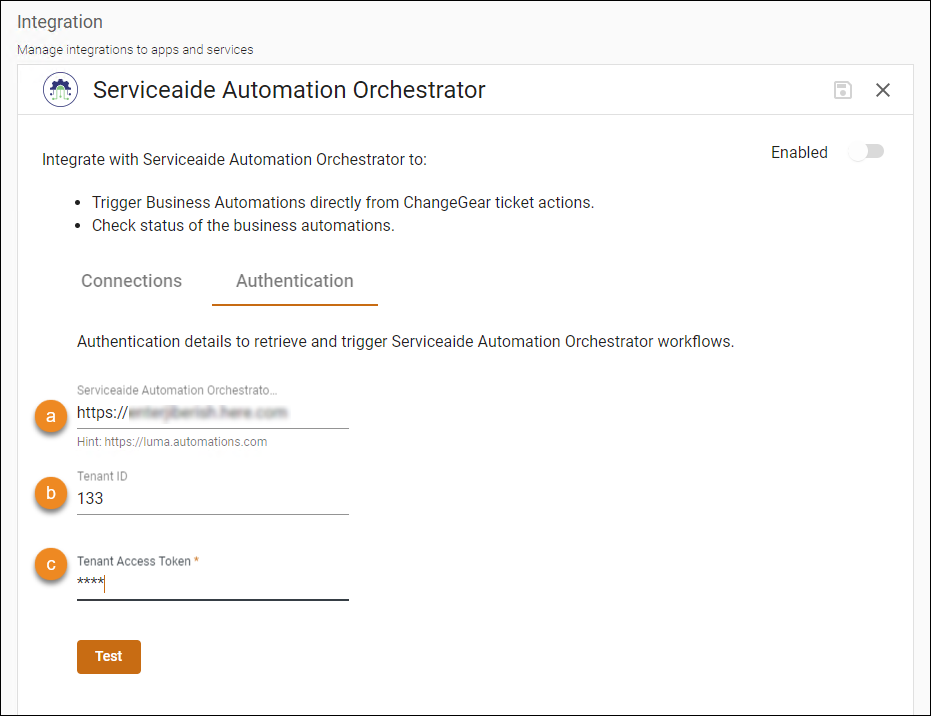
The Authentication tab must be set up before any connections can be created between ChangeGear and Serviceaide Automation Orchestrator. Complete the applicable fields in the Authentication tab (fields indicated with an asterisk (*) are required).
-
Serviceaide Automation Orchestrator Base URL - The base URL that points to the Serviceaide Automation instance that is going to be used.
-
Tenant ID - The ID of the given tenant.
-
Tenant Access Token - The access token to use for authentication with Serviceaide Automation.
Click Test to validate the information you entered is correct.
Note: It is also a good idea to test the overall configuration by creating and submitting a new ticket for the new (test) channel to make sure it appears in the external app.
-
-
After completing the Authentication tab, you can create a connection under the Connections tab. Complete the applicable fields (fields indicated with an asterisk (*) are required).
-
Enabled toggle (top right) - Enables or disables the integration.
-
Connection - This drop-down will display the list of connections for this integration, which allows for switching between connections when more than one is set up. Note: If a connection is not yet set up, you won't see this field.
-
Name - Name of the connection, which should be unique to distinguish it from other connections (e.g., Name: CreateTicketHelpDesk).
-
Description - Description for the integration to make it easier to identify as new integrations are added (e.g., Description: For creating Help Desk Incident tickets).
-
Module - The ChangeGear ticket module to be used with the integration.
-
Serviceaide Automation Orchestrator API URI - The API to get the workflow definitions, which will probably match the hint below this field.
-
Workflow - The Serviceaide Automation workflow you want to trigger with this integration.
-
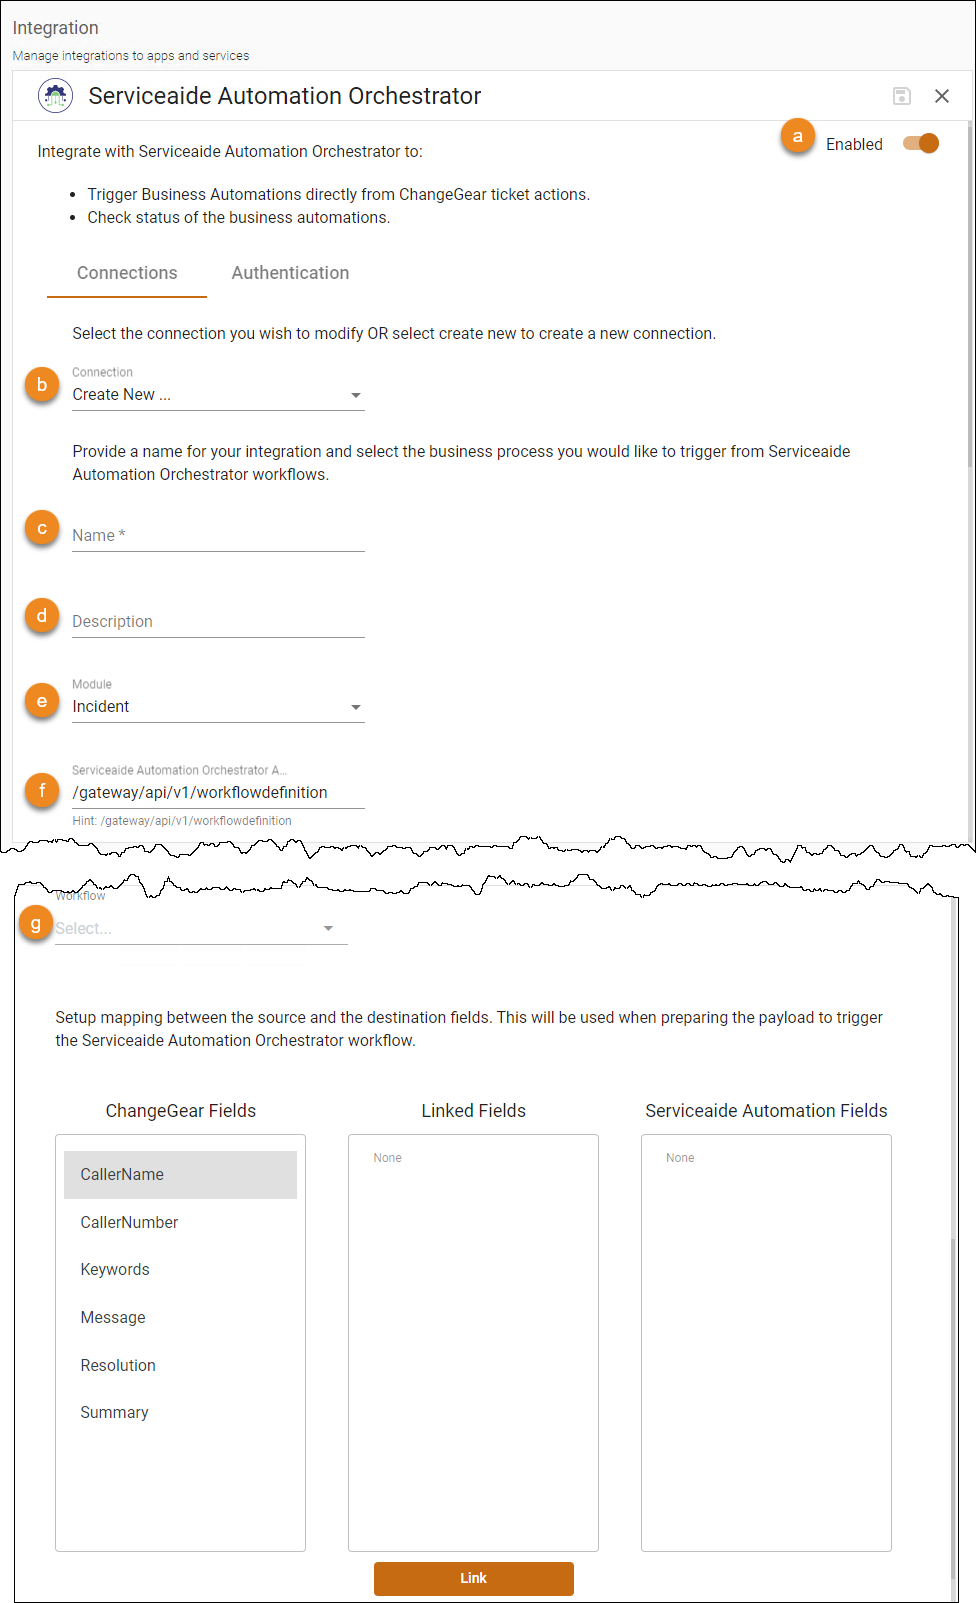
Below the Workflow, you will see the list of fields that can be mapped.
-
ChangeGear Fields will display the list of fields for the module selected from the Module drop-down list.
-
Linked Fields displays the currently mapped fields between ChangeGear and Serviceaide Automation.
-
Serviceaide Automation Fields will display the list of input fields on the selected workflow from the Workflow dropdown (it is possible for workflows to not have input values, but most will).
-
To map two fields, select a field from the ChangeGear Fields box, select one from the Serviceaide Automation Fields box, and click the Link button below to link the two fields together.
Note: The Serviceaide Automation fields are the inputs to the Automation workflow, so it is important to link all of the fields correctly. This will ensure the right information is passed on to SA Automation workflow.
-
Click the Save (
 ) icon to save the connection.
Once you have completed the steps shown above, you need to configure ChangeGear Desktop Client for outbound communications.